A slow MacBook is almost always caused by a few fixable issues: too many background apps, full storage, outdated software, or built-up cache. The fastest fixes include disabling startup items, clearing browser and system cache, freeing up SSD space, and using Activity Monitor to quit resource-hungry apps. These steps require no paid tools and take under 30 minutes. Applying even three or four of them will produce a noticeable speed improvement on most MacBooks.
Is your MacBook running slow when it used to feel fast? You are not alone. Many MacBook Air and MacBook Pro users notice their system dragging over time, even on relatively new machines. The good news is that most slowdowns are software-level problems, not hardware failures. You do not need to buy a new Mac or install expensive cleaning apps. This guide walks you through eight free, practical steps to speed up your MacBook using only built-in macOS tools. Every tip works on macOS Sequoia (macOS 15) and takes just a few minutes to complete.
Why Is My MacBook Running Slow?
Before jumping into the fixes, it helps to understand what is actually causing the problem.
A MacBook slows down when its CPU, RAM, or SSD storage gets over-stressed. These are the four most common culprits:
- Too many startup apps running silently in the background from the moment you boot up
- Low SSD storage forcing macOS to work harder to manage files and virtual memory
- Accumulated cache from browsers, email apps, and system processes piling up over time
- Outdated macOS software that is missing performance patches
The reassuring part: you almost certainly do not need a hardware upgrade. These are all fixable with the steps below.
Step 1: Free Up Storage Space on Your MacBook
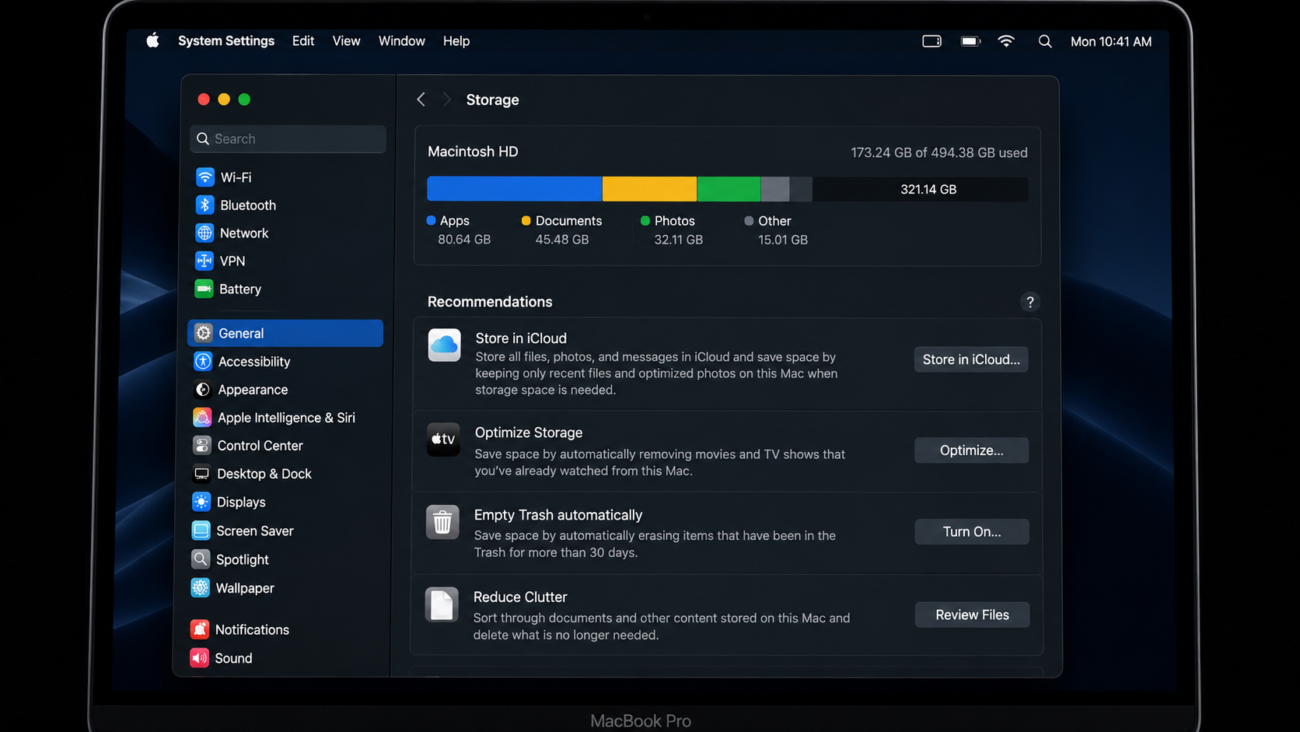
One of the most common reasons a MacBook runs slow is a nearly full hard drive. Apple recommends keeping at least 10 to 20 GB of free SSD space at all times. When your storage drops below that threshold, macOS struggles to create temporary files and manage virtual memory, which slows everything down noticeably.
Here is how to check your storage and free up space:
- Click the Apple menu in the top-left corner
- Select About This Mac
- Click More Info, then scroll to Storage Settings
- Review what is taking up space
What to Delete First
Once you can see your storage breakdown, focus on these areas:
- Downloads folder – Clear out files you no longer need
- Trash – Empty it completely (right-click the Trash icon, select Empty Trash)
- Large unused apps – Delete apps you have not opened in months
- iCloud offloading – Turn on “Store in iCloud” to move files off your local drive
Even clearing 5 to 10 GB can produce an immediate improvement in macOS performance.
Step 2: Disable Startup and Login Items
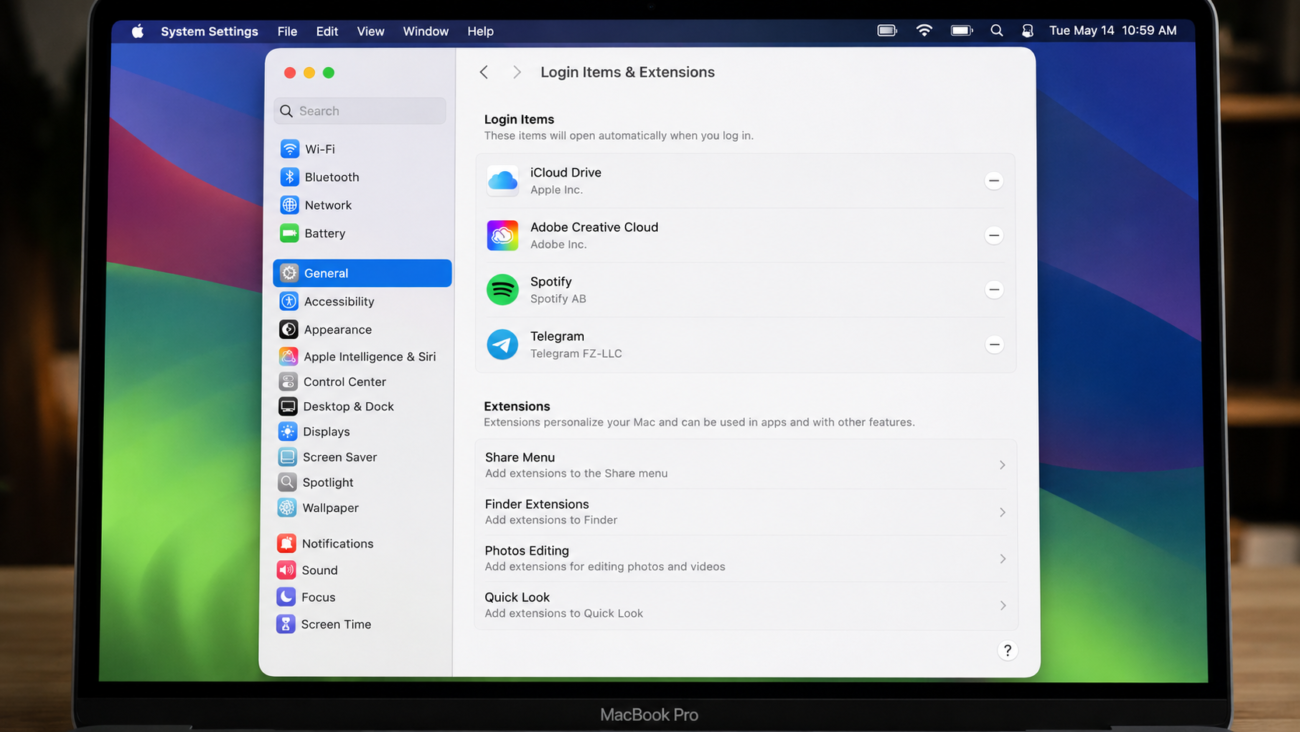
Login items are apps that launch automatically every time you turn on your Mac. Over time, these pile up without you noticing, and they run silently in the background draining your CPU and RAM from the moment you boot up. Startup programs are cited as one of the biggest reasons Macs run slow.
Here is how to manage them in macOS Sequoia:
- Open System Settings
- Click General
- Select Login Items and Extensions
- Review the list under “Open at Login”
- Click the minus (-) button next to any app you do not need at startup
Many email-heavy Mac users find that apps like Microsoft Outlook, Apple Mail, and Slack are set to launch at login without realizing it. Removing them from login items does not uninstall them. You can still open them manually whenever you want.
If you use Apple Mail regularly, cleaning up your login items pairs well with a smoother email workflow. Check out this guide on setting up Email Sorters on Mac to reduce the load that email apps place on your system.
Step 3: Use Activity Monitor to Find What Is Slowing Down Your Mac
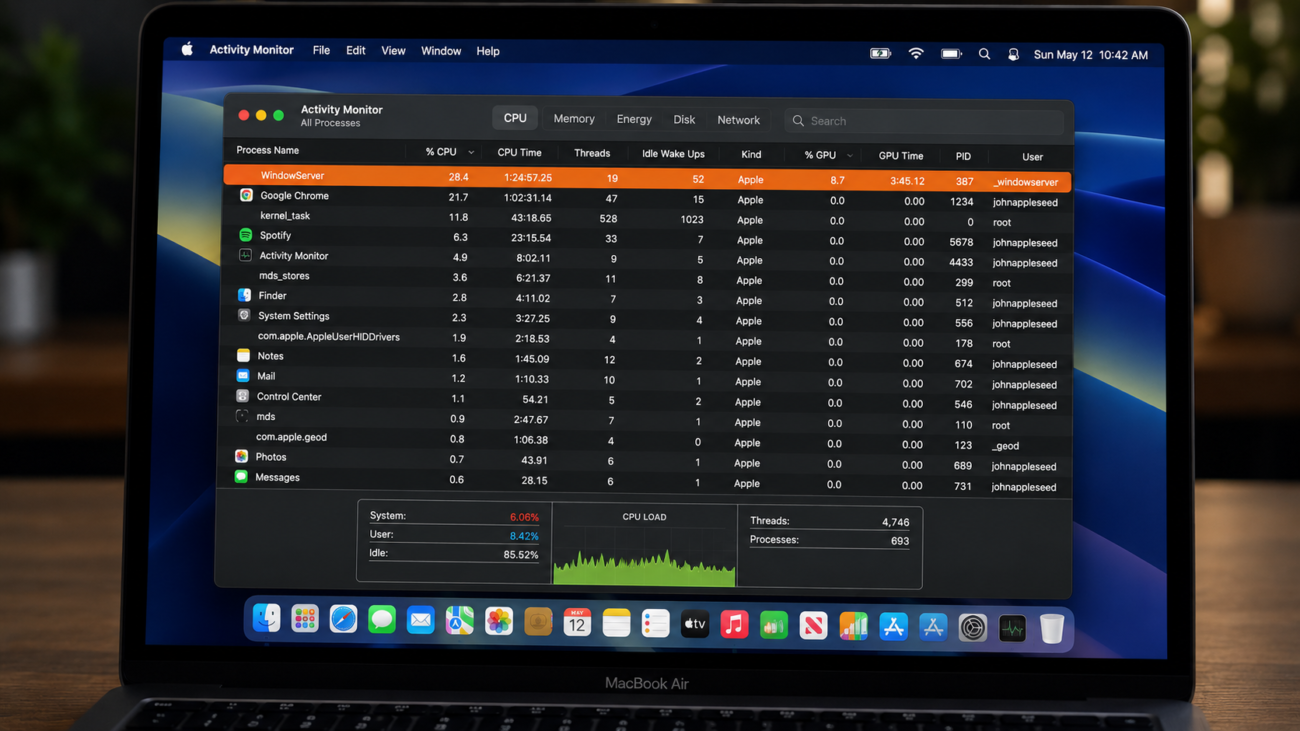
Sometimes your MacBook feels slow but you cannot tell why. Activity Monitor is macOS’s built-in diagnostic tool that shows you exactly which apps are using the most CPU and RAM in real time.
Here is how to use it:
- Press Command + Space to open Spotlight
- Type Activity Monitor and press Enter
- Click the CPU tab to see which processes are consuming the most processing power
- Click the Memory tab to see which apps are using the most RAM
CPU Tab vs. Memory Tab: What to Look For
On the CPU tab, look for any app consistently above 80 percent CPU usage that you do not actively need open. On the Memory tab, watch for the “Memory Pressure” graph at the bottom. If it is red or yellow, your Mac is under significant RAM strain.
To quit a resource-heavy app, select it in the list and click the X button at the top-left of Activity Monitor. Closing apps that are not in use is one of the simplest and most effective things you can do to improve macOS performance.
Step 4: Clear Browser and System Cache
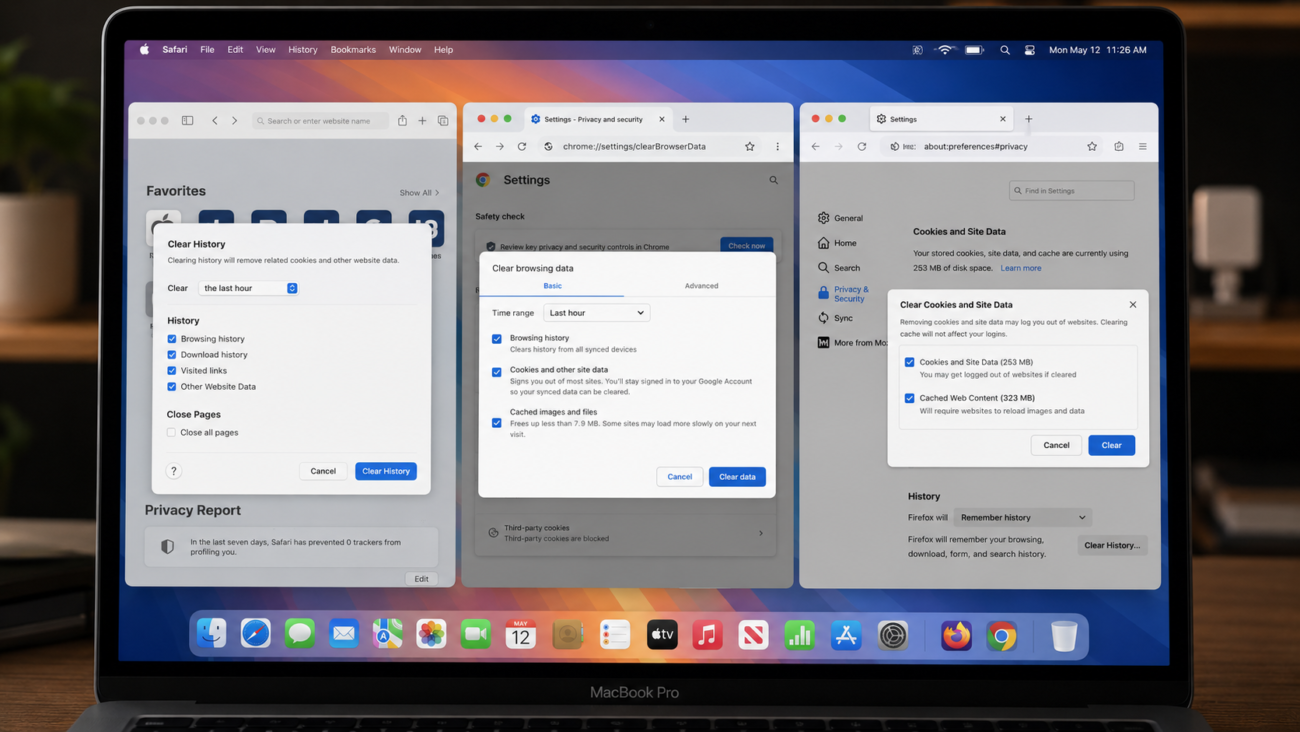
Cache files are temporary data that apps and browsers store to load faster in the future. Over time, this cache builds up and actually starts slowing things down instead of helping. Clearing it is one of the fastest ways to give your MacBook a speed boost.
Clear Browser Cache
The steps differ slightly by browser:
- Safari: Go to Safari in the menu bar, click Settings, select the Privacy tab, then click Manage Website Data and Remove All. Or go to History and click Clear History.
- Chrome: Press Command + Shift + Delete, select a time range, check “Cached images and files,” and click Clear data
- Firefox: Go to Settings, click Privacy and Security, scroll to Cookies and Site Data, and click Clear Data
Clear System App Cache
For a deeper clean of your system and app cache:
- Open Finder
- Press Command + Shift + G to open the Go To Folder window
- Type ~/Library/Caches and press Enter
- Open the folders for apps you regularly use and delete the contents inside (not the folder itself)
- Restart your Mac after clearing cache
Be careful here. Only delete files inside cache folders for apps you recognize. Do not delete system folders you are unsure about.
For email-heavy Mac users, browser cache builds up especially fast from Gmail, Outlook Web, and other web-based email platforms. If you are looking for a lighter way to manage email on Mac, explore the best email sorting tools for Apple Mail to reduce how hard your system works to keep up with a busy inbox.
Step 5: Turn Off Visual Effects and Animations
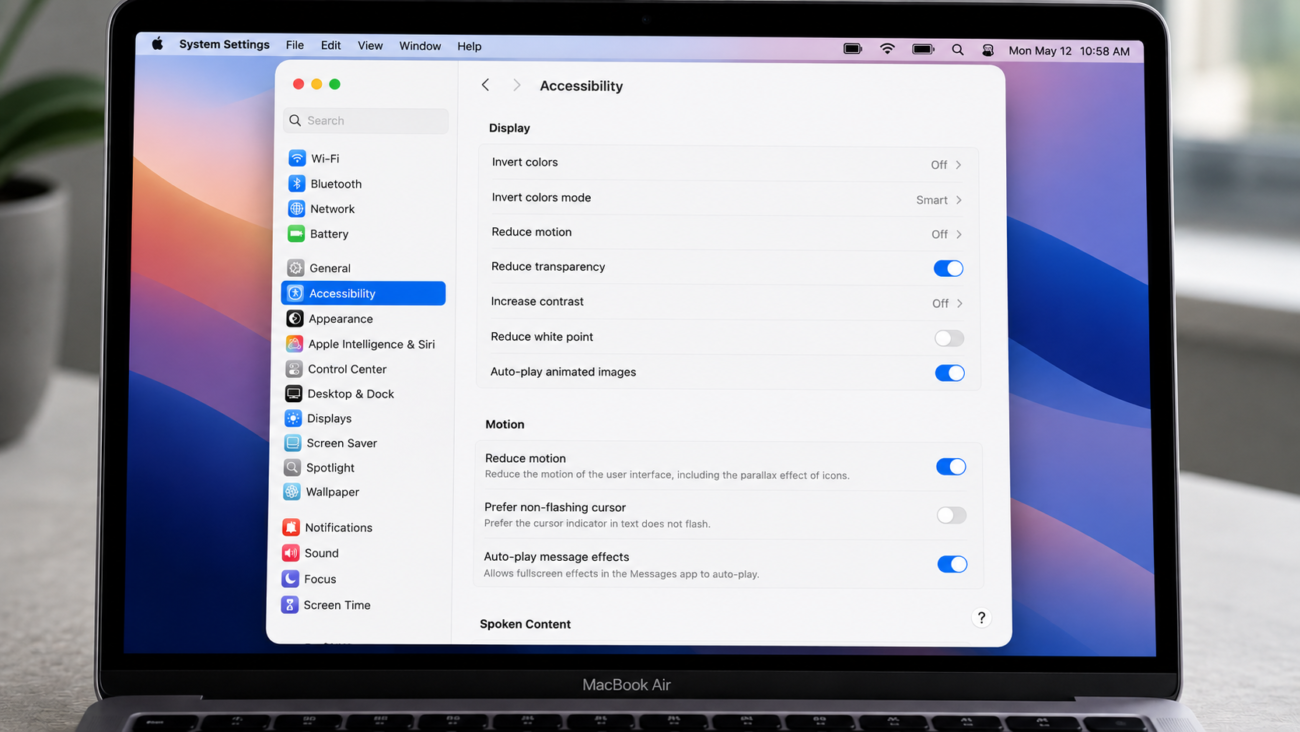
macOS Sequoia includes several visual effects that look polished but quietly consume GPU resources. Turning them off does not change how your Mac functions. It just removes the extra processing your system has to do to render those animations.
Make these four quick changes in System Settings:
- Reduce Motion: Go to Accessibility, click Motion, turn on Reduce Motion
- Reduce Transparency: Go to Accessibility, click Display, turn on Reduce Transparency
- Change Genie Effect to Scale Effect: Go to Desktop and Dock, find the “Minimize windows using” dropdown, and change it from Genie to Scale
- Disable “Animate opening applications”: In Desktop and Dock, toggle off “Animate opening applications”
These four changes alone can make your MacBook feel noticeably snappier, especially on older models.
Step 6: Keep macOS and Apps Updated
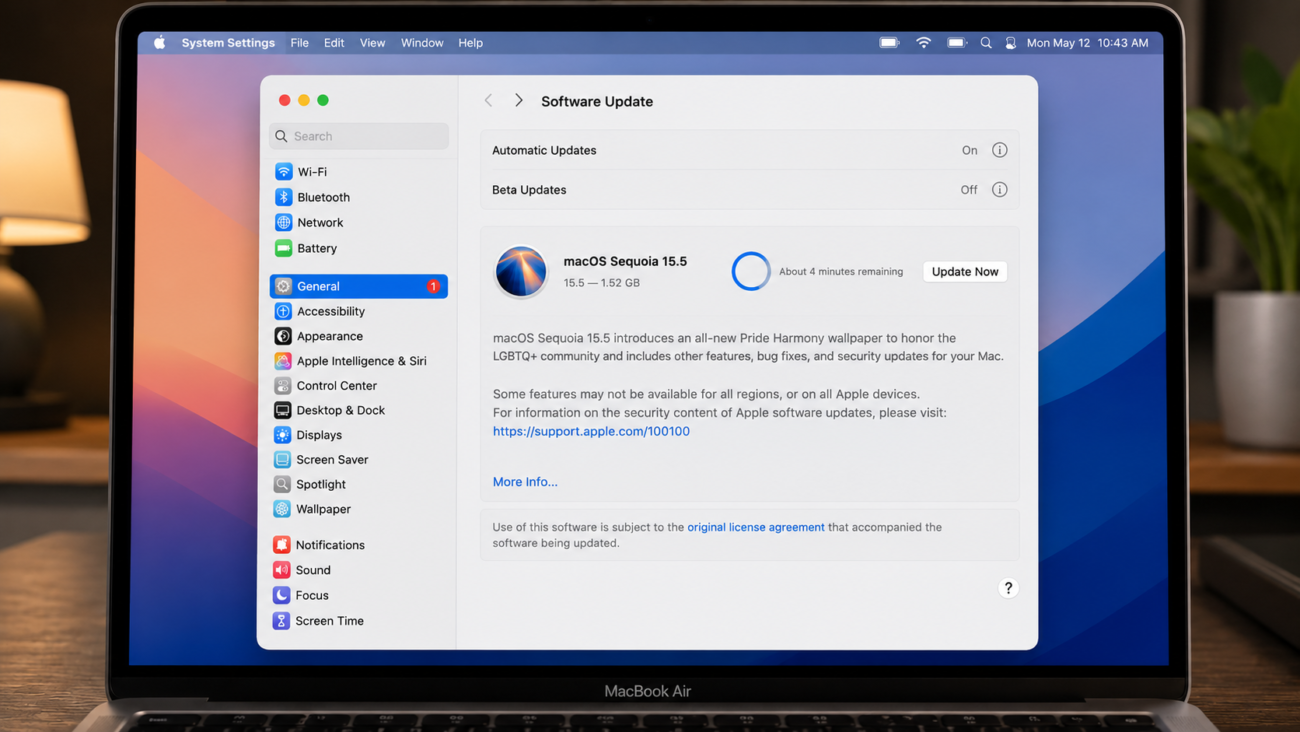
Running outdated software is a quiet performance killer. Apple regularly releases macOS updates that include performance patches alongside security fixes. Staying on an older macOS version means missing out on those speed improvements.
As of 2025, macOS 15 Sequoia is running on 62.92 percent of all Mac devices, making it the dominant version. If you are still on an older version, updating could immediately improve system responsiveness.
Here is how to update:
- Open System Settings
- Click General
- Select Software Update
- Install any available updates
To update your apps separately, open the App Store, click Updates in the sidebar, and install any pending updates. Enabling automatic updates is also worth doing so future patches install without you having to think about it.
Step 7: Clean Up Your Desktop and Manage iCloud Sync
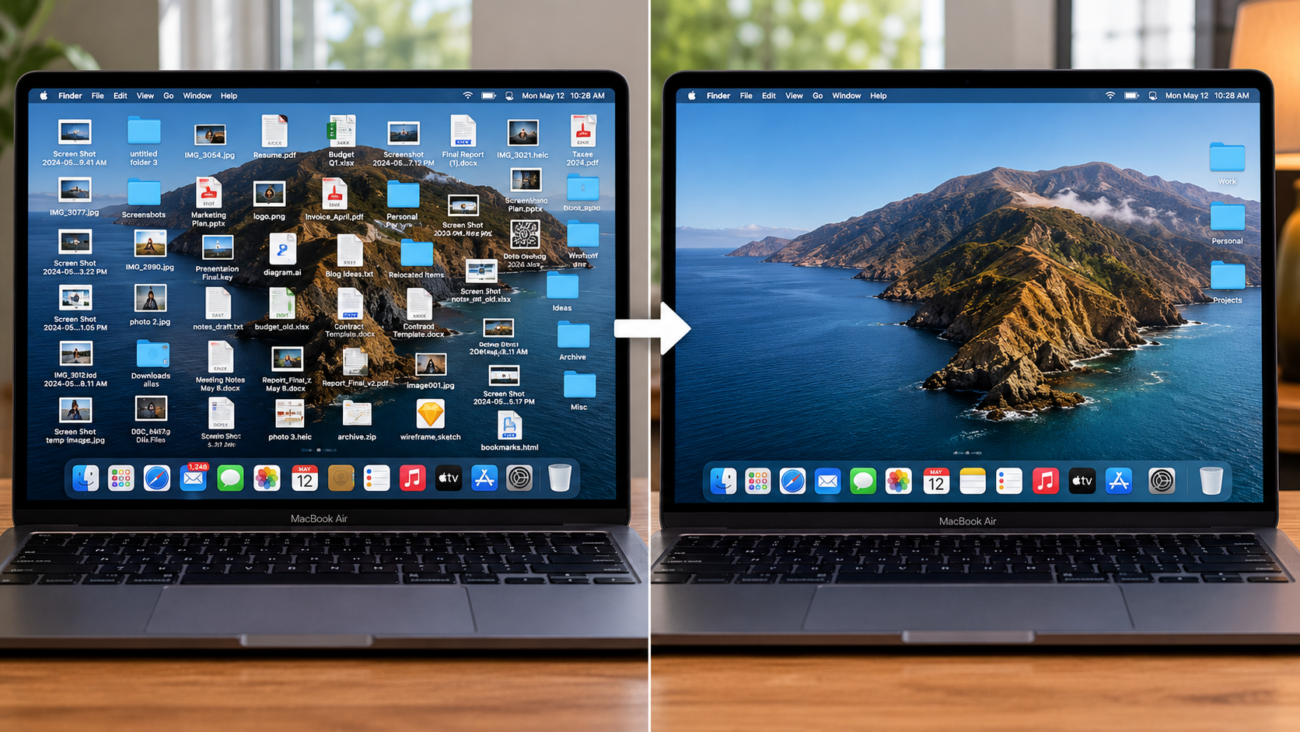
This one surprises a lot of people. A cluttered desktop actually slows Finder and display rendering because macOS must individually process and render every file icon sitting on your desktop.
Here is what to do:
- Move desktop files into organized folders inside your Documents folder
- Aim to keep only 5 to 10 shortcuts on your desktop at most
- Right-click the desktop and choose Use Stacks to automatically group files by type
One more thing to check: if iCloud Desktop sync is turned on, macOS constantly syncs every desktop file to iCloud in real time. For users with large numbers of files sitting on their desktop, this creates ongoing background CPU and network activity.
To check this setting, go to System Settings, click your Apple ID, select iCloud, click iCloud Drive options, and review whether Desktop and Documents syncing is enabled. If your desktop is cluttered with email attachments and downloaded files, this is likely a silent drag on your MacBook’s speed.
Step 8: Restart Your MacBook Regularly
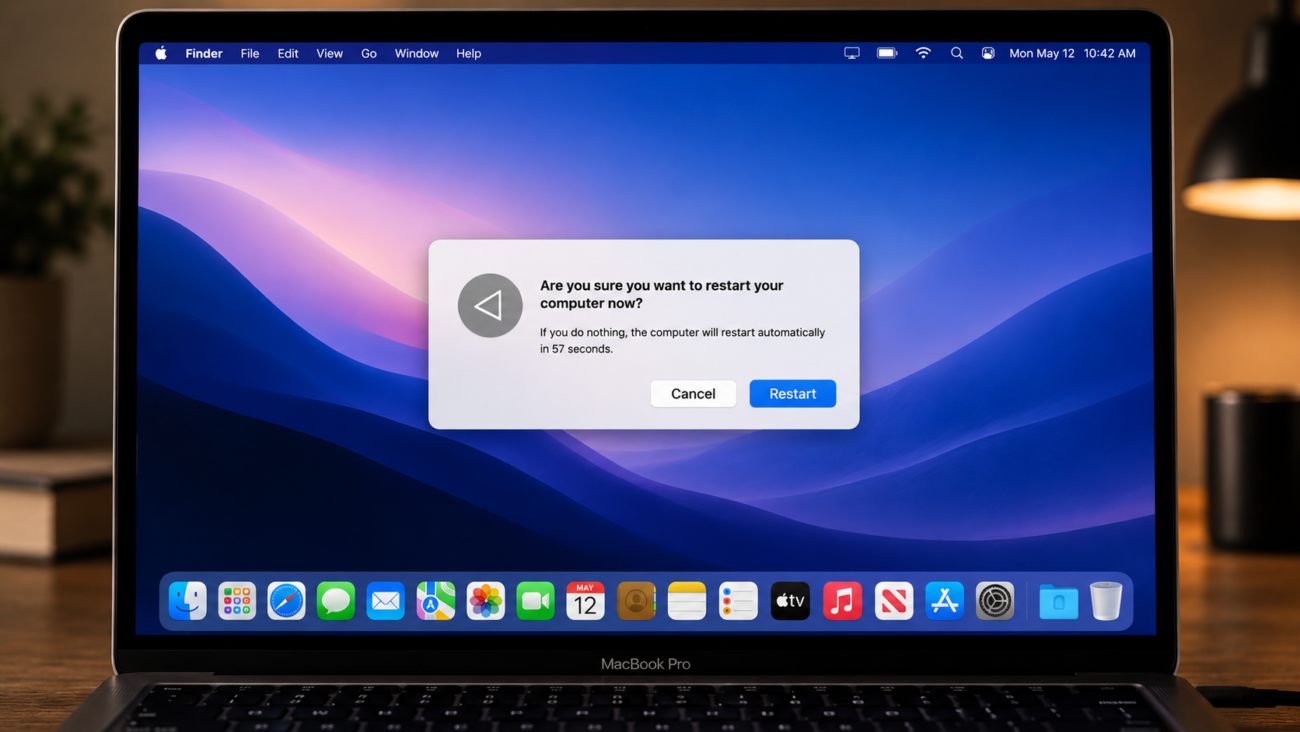
This is the simplest fix on the list, and it is one many busy professionals skip. Restarting your Mac clears RAM, terminates stuck background processes, and gives macOS a completely fresh state.
The key difference between Sleep and Restart matters here. When you close your MacBook lid, apps keep running in the background. RAM does not get cleared. Over days or weeks of sleep-only use, memory pressure builds up and your Mac gets progressively slower.
A simple rule: restart your MacBook at least once per week. It takes two minutes and makes a real difference in performance over time.
Do You Need a Paid Mac Cleaning App?
In most cases, no. macOS already includes built-in tools that handle every core task a paid cleaning app would perform.
Here is a quick side-by-side:
| Task | Built-In macOS Tool | Paid App Alternative |
| Check CPU and RAM usage | Activity Monitor | CleanMyMac, iStatMenus |
| Manage startup items | System Settings (Login Items) | CleanMyMac |
| Free up storage | Storage Management | DaisyDisk, CleanMyMac |
| Clear cache | Finder (Library/Caches) | CleanMyMac, CCleaner |
| Update software | App Store + Software Update | Third-party updaters |
The honest verdict: try every step in this guide first. If your Mac performance is still poor after doing all of them, a paid tool can add convenience, but it will not do anything these built-in tools cannot already accomplish for free.
Speeding Up Your MacBook for Email and Productivity
If you use your MacBook heavily for email, remote work, or managing a busy inbox, there are a few extra performance tips worth knowing.
Email apps are among the most resource-intensive apps on a Mac. Apple Mail, Microsoft Outlook, and even Gmail open in Chrome all consume significant RAM and CPU during background sync. Here is how to keep your email workflow from dragging down your whole system:
- Limit browser tabs with Gmail open. Every active Gmail tab keeps syncing in the background. Use one tab, not five.
- Check if Apple Mail or Outlook is in your Login Items. These apps do not need to launch at startup unless you are actively waiting for urgent messages.
- Clean out your Downloads folder regularly. Email attachments are one of the biggest sources of desktop and Downloads clutter that eats up SSD space.
- Consider web-based email alternatives that are lighter on system resources than full desktop clients.
A well-organized email workflow directly reduces the processing load on your Mac. If you want to take this further, the Email Sorters Mac setup guide walks through how to configure a leaner, faster email experience built specifically for Mac users.
Final Thoughts
You do not need to spend money or buy new hardware to make your MacBook run faster. In almost every case, macbook performance issues come down to a handful of fixable software and settings problems. Clearing storage, managing login items, using Activity Monitor, and keeping macOS updated will solve the problem for most users.
The biggest wins come from Step 1 (free up storage) and Step 2 (disable startup items). If you only have ten minutes, start there.
For email-heavy Mac users and productivity-focused professionals, pairing these performance fixes with a smarter email workflow makes an even bigger difference. A fast Mac combined with an organized inbox means less friction, less frustration, and more focus on the work that matters.
If managing email on Mac is part of your daily routine, explore web-based email tools and productivity setups that work better with a leaner macOS environment. Your MacBook will thank you.